|
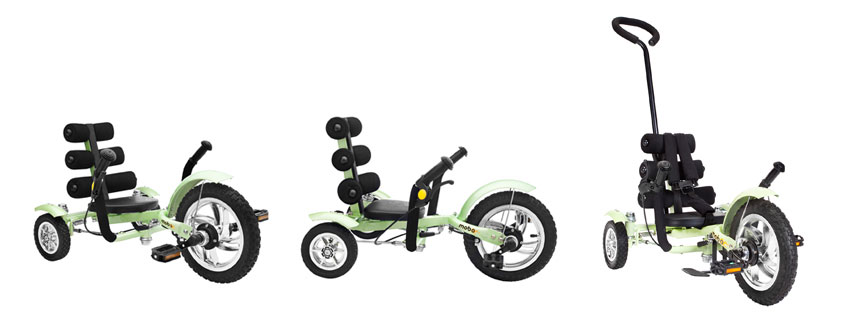
Step 1:
Place rear frame set between back support and front frame set.
Make sure linkage is facing the steering handle.
|
|
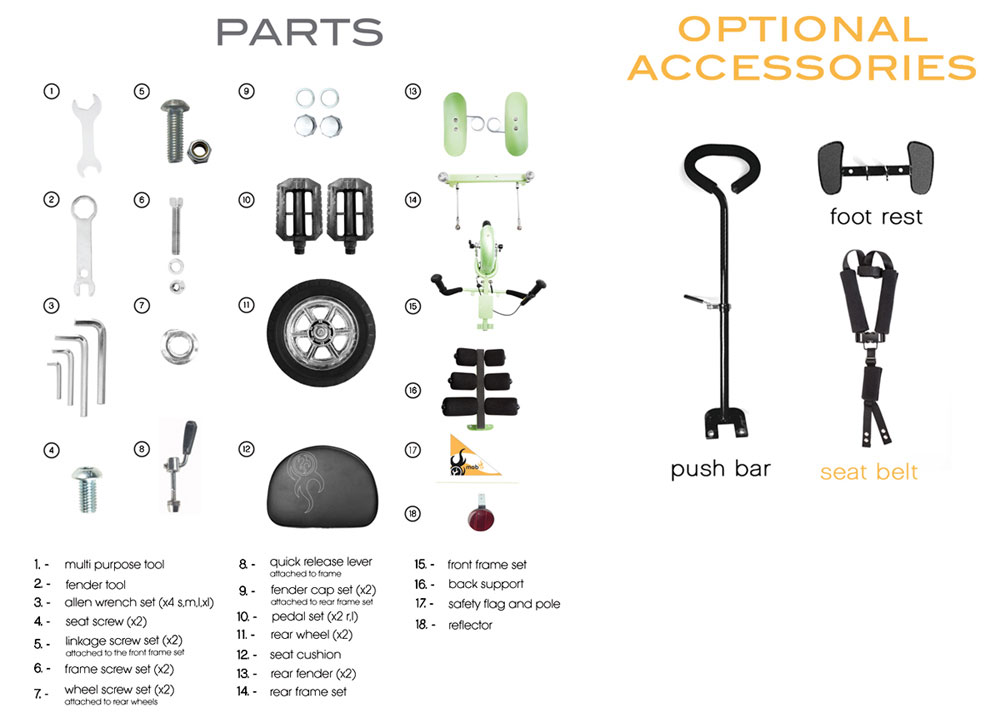
Step 2:
Align screws.
|
|
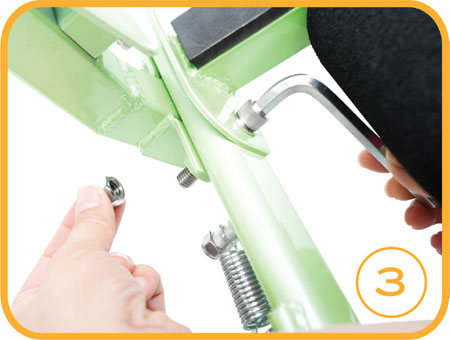
Step 3:
For models WITH push bar, tighten bolt only using allen wrench. Do not attach nut.
For models WITHOUT push bar, tighten bolt and nut using allen wrench and multi-purpose tool.
Reflector can be attached by inserting below frame before tightening nut.
|
|
Step 4:
Remove screws on the steering handle and align with steering handles.
Make sure brake cable is located above linkage.
|
|
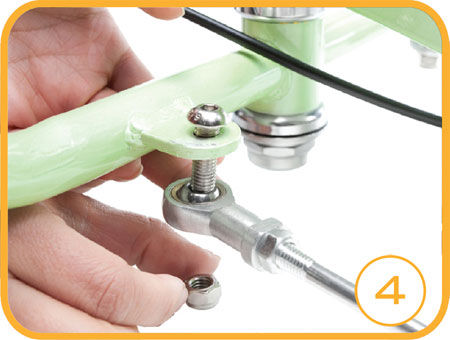
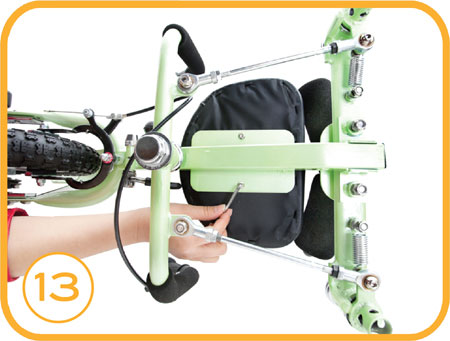
Step 5:
Attach nut to bolt.
|
|
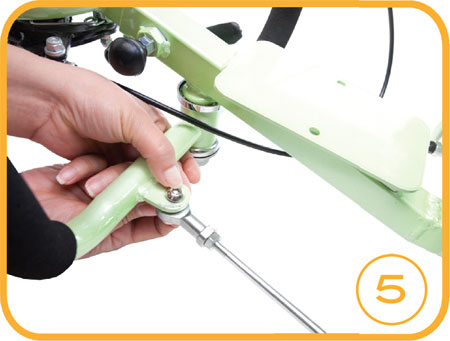
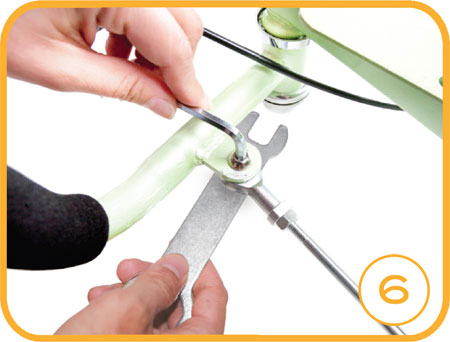
Step 6:
Tighten using allen wrench and fender tool.
|

|
Step 7:
(* For seat belt only - If your model does not have a seat belt, skip to Step 13)
Align bottom of seat belt to seat base on frame and bottom of seat.
|
|
Step 8:
(* For seat belt only)
Tighten bolt and repeat on other side.
|
|
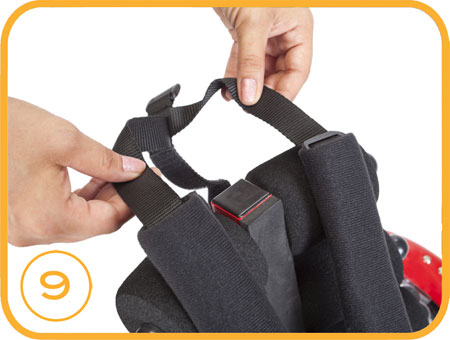
Step 9:
(* For seat belt only)
Wrap top of seat belt over back support.
|

|
Step 10:
(* For seat belt only)
Wrap velcro strip around metal frame located below top cushions on back support.
|
|
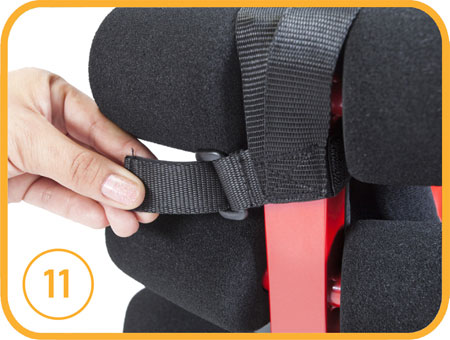
Step 11:
(* For seat belt only)
Pull velcro strip through buckle.
|
|
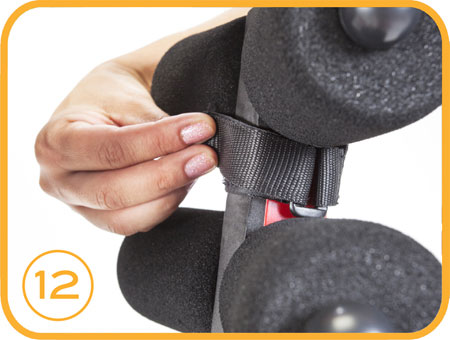
Step 12:
(* For seat belt only)
Attach velcro.
|
|
Step 13:
Tighten seat cushion to seat base.
|
|
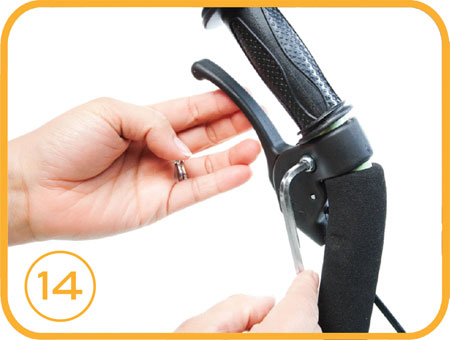
Step 14:
Adjust hand brake as needed,
Use allen wrench to tighten hand brake (located on steering handle).
|
|
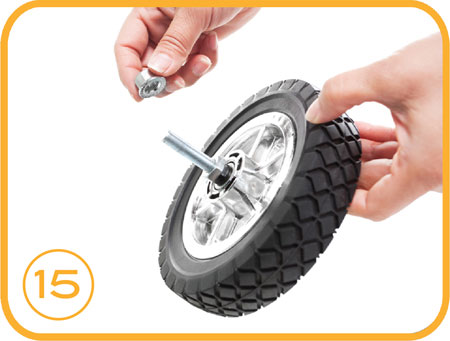
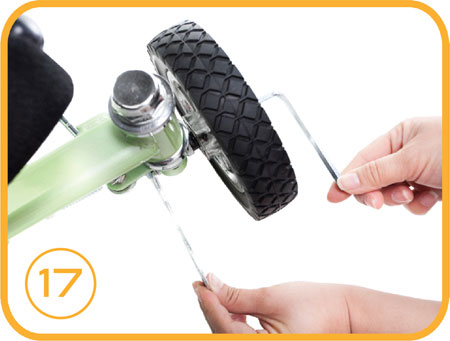
Step 15:
Remove nut from wheel.
|
|
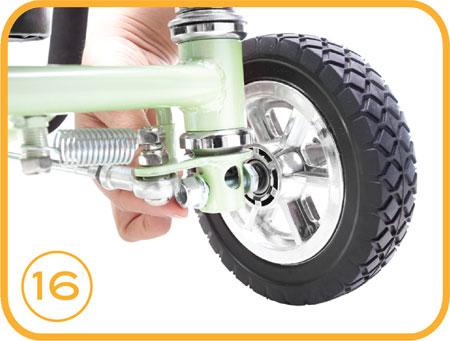
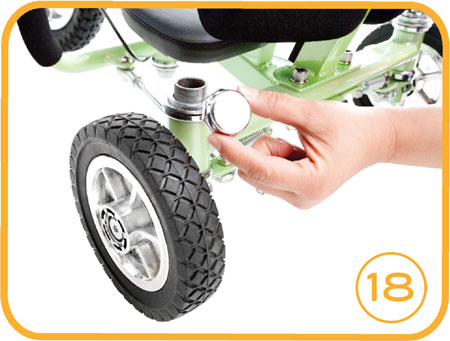
Step 16:
Insert wheel onto rear frame.
|
|
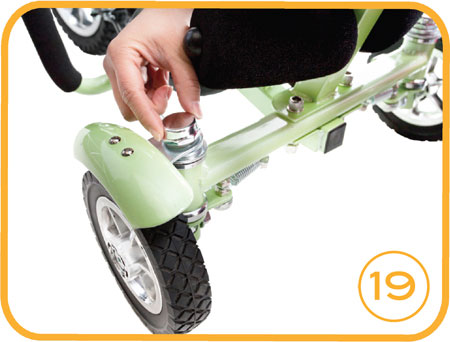
Step 17:
Use fender tool and allen wrench to tighten wheel.
Repeat on other side.
|
|
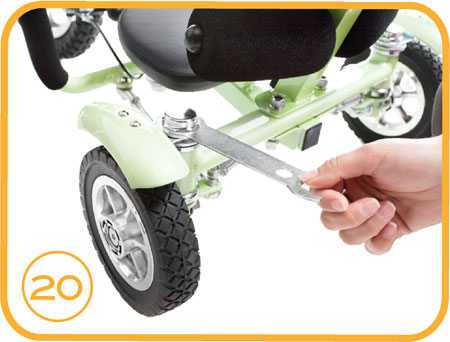
Step 18:
Remove chrome caps locate next to rear wheels.
|
|
Step 19:
Place fender above each wheel. Replace caps.
|
|
Step 20:
Tighten caps using fender tool.
|
|
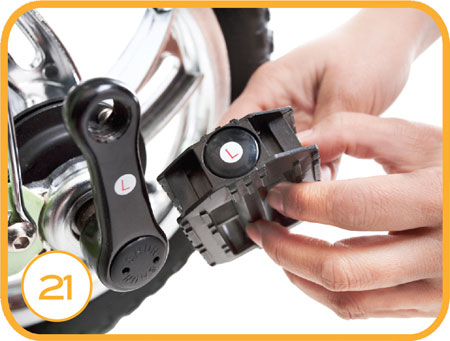
Step 21:
Match the side of the pedals by matching the "L"/ "R" stickers on the pedals and cranks.
|
|
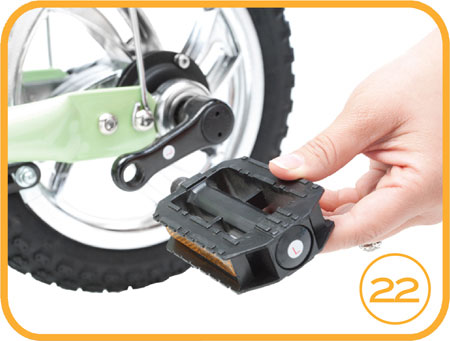
Step 22:
Attach pedal to crank.
Make sure to screw "R" pedal clockwise and "L" pedal counterclockwise.
|
|
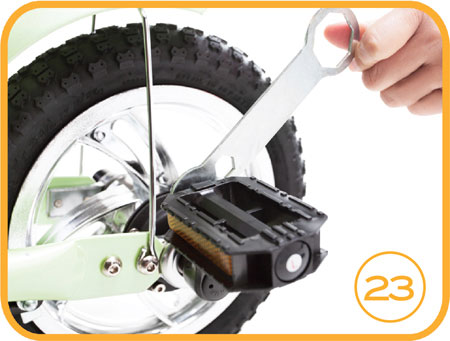
Step 23:
Tighten using fender tool.
|
|
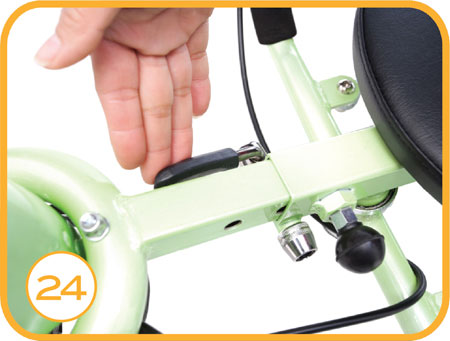
Step 24:
Loosen quick release lever located at the middle of cruiser.
Pull knob to adjust frame to desired length.
Tighten lever.
|
|
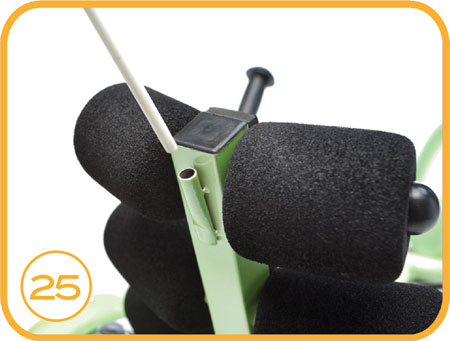
Step 25:
Insert flag into slot on top of back support.
|
|
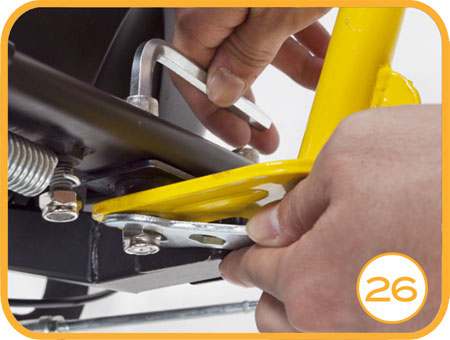
Step 26:
(* For push bar only)
Align push bar under rear frame with bolts and tighten nut onto bolt.
|
|
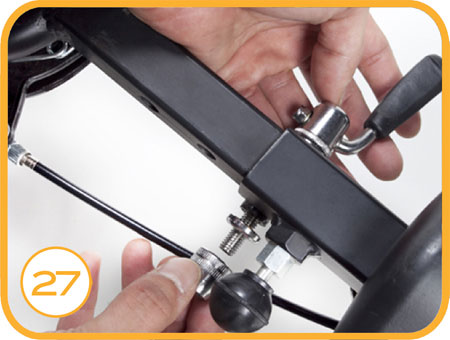
Step 27:
(* For foot rest only)
Loosen and remove quick release lever.
|
|
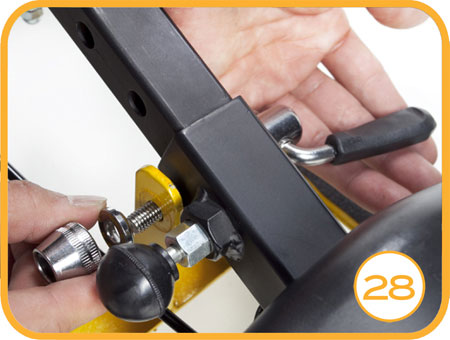
Step 28:
(* For foot rest only)
Align foot rest onto frame, attach and tighten quick release lever.
|